

Fake Door Test: Validate Demand Before You Build
By Omar Zidan, Founder

A fake door test presents a realistic entry point to a feature that doesn’t exist yet and then measures whether users actually click it. That behavioral signal, not a survey, not a gut feeling, tells you whether demand is real before a single line of code gets written.
Here’s what to do in the next 24-72 hours:
- Write your hypothesis: “If [audience] sees [entry point] in [placement], at least [X]% will click within [Y] days.”
- Pick your placement: dashboard, pricing page, empty state, or a dedicated landing page.
- Choose one metric and set a threshold in advance. Don’t decide what “good” looks like after you see the numbers.
- Timebox the test: 7-14 days is the standard window for most teams.
- Plan the reveal: the moment someone clicks, they see an honest disclosure, a thank-you, and one clear next step (waitlist, beta invite, or a single-question survey).
The ethical rule is non-negotiable: be transparent immediately after the click. Fake door testing validates demand before building by using click behavior as the primary signal, but that signal is only trustworthy if you treat the people generating it with respect.
Key Takeaways
A fake door test is the fastest way to validate demand before you build, but only when the hypothesis is clear, the cohort is targeted, and the follow-up is prompt.
| Point | Details |
|---|---|
| Write the hypothesis first | Define audience, placement, metric, and pass threshold before the door goes live. |
| Timebox to 7-14 days | Remove the door on schedule; longer windows introduce novelty decay and trust erosion. |
| Target 100+ clicks minimum | For low-traffic products, fewer clicks produce volatile results that can flip with small changes. |
| Follow up within 24-72 hours | Email every clicker promptly; convert opt-ins into interviews to understand why they clicked. |
| Unthinkable surfaces demand signals | Use the Global Opportunity Finder and AI Advisor to build sharper hypotheses and identify qualified early adopters. |
Table of Contents
- What is a fake door (painted door) test?
- How do you design, launch, and close a fake door test?
- What metrics should you track, and how do you read click signals?
- When should you use a fake door test, and when should you choose something else?
- What are the benefits and risks of fake door testing?
- What are the best practices and common pitfalls?
- How does a fake door test compare to other validation methods?
- Which tools and templates help you run a fake door test?
- What does the research say about avoiding misread click signals?
- When fake doors work, and when they mislead you
- Unthinkable gives you demand signals before you write the hypothesis
- Sources
What is a fake door (painted door) test?
A fake door test, also called a painted door test or smoke test, simulates a feature by placing a realistic entry point in your product or on a landing page. The entry point looks functional. It isn’t. When a user clicks it, they’re routed to a reveal page or modal that explains the feature is coming soon.
According to Coursera’s product management curriculum, a painted door test captures clicks and signups to estimate user interest and help teams prioritize features before committing development resources.
The mechanics are simple:
- Create the entry point: a button, a pricing tier, a nav item, or a feature card that looks native to your UI.
- Instrument the click: log the event with user context (more on this in the metrics section).
- Route to a reveal page: honest disclosure, a thank-you, and one CTA.
- Capture intent: an email signup, a waitlist entry, or a one-question micro-survey.
Quick real-world examples:
- An “Export to PDF” button in a SaaS dashboard that routes to a waitlist.
- A new pricing tier labeled “Enterprise” that leads to a “We’re building this, want early access?” modal.
- A landing page promoted via paid ads for a product that doesn’t exist yet, measuring signup rate.
Where fake door tests fall short: they measure intent, not satisfaction. They can’t tell you whether users will love the experience once it’s built, whether a multi-step workflow will feel intuitive, or whether a payment flow will convert. Never run a fake door on safety-critical or trust-sensitive flows. A fake “Forgot Password” button is not an experiment; it’s a support ticket waiting to happen.
The term “smoke test” overlaps in some circles but usually refers to a basic software build check. “Painted door” and “fake door” are interchangeable in product development contexts.
How do you design, launch, and close a fake door test?
Follow this sequence. Each step is a decision point, not a formality.
Step 1: Write a falsifiable hypothesis
Format it as: “If [specific audience segment] sees [entry point] in [placement], at least [X]% will click within [Y] days.” Define what a pass looks like before you launch. Teams that set thresholds after seeing results are rationalizing, not validating.
Step 2: Choose the right placement
Put the door where users would naturally look for that capability. A reporting feature belongs near existing reports, not buried in settings. A pricing add-on belongs on the pricing page. Poor placement contaminates your signal before the test even starts.
Step 3: Design it to look native
Copy, tone, button weight, and visual style must match the surrounding UI. A button that looks like a marketing banner will get ignored or clicked out of curiosity rather than genuine intent. Both outcomes are noise.
Step 4: Instrument every event
Capture these properties on every click event:
- User ID and account/subscription plan
- Feature context (page, location in UI)
- Referral source and device
- Timestamp and experiment ID
Instrument clicks, route clickers to a transparent reveal, and follow up promptly so quantitative signals can be turned into qualitative insight. Without the right event properties, you can’t slice the data by the segments that actually matter.
Step 5: Build the reveal page
The reveal page is where trust is either built or broken. It needs:
- An honest, plain-language disclosure (“This feature isn’t live yet.”)
- A genuine thank-you
- One CTA: join a waitlist, answer one question, or request early access
- A clear path back to the task the user was doing
Step 6: Define run window and ownership
Set a start date, an end date, and a named owner. Define criteria for an early stop (unexpected harm, a critical bug in the door itself, or a data quality issue). A test without an end date becomes a dead door.
Step 7: Close the test and follow up
Remove the door the moment the timebox ends. Email every person who clicked within 24-72 hours. Schedule follow-up interviews with anyone who opted in. That opt-in list is your most qualified research cohort.
Pro Tip: Run fake doors on narrow, targeted in-app cohorts first. You’ll get cleaner signals from users who already have context. Use landing pages and paid ads only when you’re testing demand from audiences outside your current user base.
What metrics should you track, and how do you read click signals?
Raw clicks are not a decision. They’re the start of one. Here’s how to build the full picture.
Primary metrics
| Metric | What it tells you |
|---|---|
| Impressions (views) | How many users saw the entry point |
| Click-through rate (CTR) | Share of viewers who clicked; measures attention |
| Unique clickers | Removes repeat-click inflation; cleaner intent signal |
| Completion rate | Share of clickers who signed up or opted in; measures stronger intent |
| Repeat clicks | Same user clicking multiple times; signals durable interest |
| Post-click engagement | Time on reveal page, survey completions, follow-up opens |
How to read the funnel
CTR shows you whether the entry point captured attention. Completion rate (opt-in or waitlist signup) is the stronger signal because it requires an additional action. Repeat clicks from the same user suggest the need is persistent, not momentary.
Practitioner heuristics suggest timeboxing tests at 7-14 days and treating a 5-15% CTR on a highly relevant in-app CTA as a strong signal. Cold ad traffic needs a higher opt-in rate to be useful because the audience is less qualified.
For low-traffic products, aim for at least 100 clicks before treating a result as meaningful. A handful of clicks, even at a high rate, can flip from pass to fail with a few more data points.
Statistical cautions
- Novelty effects: users click new UI elements out of curiosity. A spike in the first 48 hours that flattens is not demand; it’s exploration.
- Accidental clicks: mobile users tap things they didn’t mean to. Capture time-to-click and device type to filter obvious noise.
- Selection bias: if your door is only visible to power users, a high CTR reflects their behavior, not your full user base.
- Small-sample volatility: a 20% CTR from 10 impressions is not a signal. It’s a sample size problem.
Predefine pass/fail thresholds and segment-level requirements. A consistent signal across two or three meaningful segments (plan type, use-case, tenure) is more reliable than a single high overall CTR.
When should you use a fake door test, and when should you choose something else?
The method fits some questions well and others poorly.
Good fit:
- Discrete, clearly describable features where a single button or pricing tile communicates the value
- Pricing tiers or add-ons you’re considering but haven’t committed to building
- Early demand checks before any development investment
- Features where the question is “do people want this?” not “will they know how to use it?”
Poor fit:
- Complex multi-step workflows where a single entry point can’t represent the experience
- Safety- or trust-critical flows: payments, security settings, account deletion
- B2B enterprise features where a disappointed champion can escalate to churn or reputational damage
- Situations where you need to understand the job-to-be-done, not just whether people click
When to use alternatives:
- Surveys: best for exploratory discovery when you don’t yet know which features to test. They capture stated preferences, which are weaker than behavioral signals but useful for generating hypotheses.
- Wizard-of-Oz or concierge MVPs: best when you need to test whether you can deliver the experience, not just whether people want it.
- Prototypes and usability tests: best for interaction quality and workflow comprehension. Use these after a fake door confirms demand.
- MVPs: best for validating solution value and retention once demand is confirmed. Fake door tests are a precursor to MVPs: they confirm demand, while an MVP confirms whether the solution actually works and keeps users coming back.
What are the benefits and risks of fake door testing?
Benefits
- Low resource cost. A button and a reveal page can be live in hours, not sprints.
- Behavioral evidence. Clicks are harder to fake than survey responses. People vote with their cursor.
- Fast prioritization signal. A clear pass or fail in 7-14 days beats months of debate in a roadmap meeting.
- Concept comparison. You can A/B two fake doors with different copy or positioning to see which framing resonates more.
Risks
The main risk is trust erosion. The painted door test carries real trust risks; teams must disclose the experiment immediately after the click and provide a clear next step. A user who clicks “Export to PDF,” gets a dead end, and never hears from you again is not a research participant. They’re a frustrated customer.
Other risks:
- Legal and consumer-protection exposure if the fake door implies a product or pricing commitment that doesn’t exist
- Inflated signals from accidental clicks or non-native styling
- Ambiguous signals when the copy doesn’t clearly describe what the feature does
Ethics checklist
- Timebox the test and commit to removing the door on schedule.
- Disclose the truth immediately after the click, on the reveal page, in plain language.
- Capture only the data you need. Don’t collect payment information on a fake pricing page.
- Provide a clear opt-out and a path back to the user’s original task.
- Follow up with every person who clicked within 24-72 hours.
Sample reveal page copy: “This feature isn’t available yet, but you’ve helped us understand what matters to you. Join the waitlist and we’ll let you know when it’s ready.”
Sample follow-up email subject: “You clicked [Feature Name], here’s what’s happening.”
What are the best practices and common pitfalls?
Before you launch
- Write a one-line user-facing value statement for the feature (not an internal code name).
- Pick a single audience segment and stick to it.
- Set numeric thresholds for pass and fail before the test goes live.
- Assign one owner who is accountable for the result and the follow-up.
Design
- Match native UI patterns exactly. Visual weight, font, and button style must be indistinguishable from real features.
- Use specific, outcome-oriented copy. “Generate a PDF report” outperforms “Export” every time.
- Avoid bait-like visuals (flashing badges, “NEW!” labels) that drive curiosity clicks rather than genuine intent.
Instrumentation
Capture user ID, plan type, referrer, session context, and time-to-click. Tag every event with an experiment ID so you can filter it cleanly in your analytics tool. Without an experiment tag, you’ll spend hours trying to isolate the data later.
Run rules
- Timebox to 7-14 days for most teams. Longer windows introduce seasonal noise and novelty decay.
- Stop early only for unexpected harm, not because the numbers look bad at day three.
- Never leave a dead door live after the test ends. It erodes trust with every user who encounters it.
Post-test
- Remove the door immediately at the end date.
- Send a timely thank-you and next-step email to every clicker within 24-72 hours.
- Convert opt-ins into interviews or beta users. That list is the most valuable output of the test.
Common pitfalls:
- Testing too many ideas simultaneously with no separate hypotheses or thresholds
- Ambiguous copy that makes users unsure what they’re clicking
- Exposing the door to the wrong audience (power users when you need new users, or vice versa)
- Over-relying on raw CTR without looking at post-click signals
Pro Tip: Combine fake-door quantitative signals with 3-5 rapid qualitative interviews drawn from opt-ins. The clicks tell you how many people want something; the interviews tell you why, and those are two very different inputs for your roadmap.
How does a fake door test compare to other validation methods?
Each method answers a different question. Use the right tool for the question you’re actually asking.
| Method | Time investment | Data type | Customer impact | Best for |
|---|---|---|---|---|
| Fake door test | Hours to days | Behavioral (clicks) | Medium (trust risk if mishandled) | Demand validation for discrete features |
| Survey | Hours | Stated preference | Low | Exploratory discovery, hypothesis generation |
| Prototype / usability test | Days to weeks | Behavioral + qualitative | Low | Interaction quality, workflow comprehension |
| Wizard-of-Oz / concierge MVP | Days to weeks | Behavioral + qualitative | Medium | Testing delivery quality manually |
| MVP | Weeks to months | Behavioral + retention | High | Solution value, retention, willingness to pay |
Recommended sequence
- Idea: generate the hypothesis from demand signals, user interviews, or support tickets.
- Fake door: validate demand quickly and cheaply before any build commitment.
- Prototype or Wizard-of-Oz: validate the experience and interaction quality with confirmed-demand users.
- MVP: validate solution value and retention with a phased rollout to clickers who opted in.
If you have adequate traffic, run multiple fake doors in parallel, but write separate hypotheses and thresholds for each. Shared thresholds across different features produce ambiguous results.
Which tools and templates help you run a fake door test?
You don’t need a dedicated fake-door platform. Most teams already have what they need.
Tool types and when to use them:
- In-app injection and engagement tools (e.g., Userpilot, AB Tasty): add buttons, modals, or banners to your live product without a code deploy. Best for in-app fake doors targeting existing users. Userpilot lets you target specific user segments with in-app UI elements, making cohort control straightforward. AB Tasty supports A/B variants of fake doors so you can compare two feature framings simultaneously.
- Landing-page builders (e.g., Webflow, Carrd, Unbounce): spin up a standalone page in hours for testing demand from outside your current user base. Pair with a paid ad or email campaign.
- A/B testing platforms (e.g., Amplitude Experiment): instrument and analyze click events with statistical rigor. Amplitude’s experiment layer lets you tie fake-door click events directly to your existing user analytics for segment-level analysis.
- Email platforms (e.g., Mailchimp, Customer.io): send timely follow-ups to everyone who clicked. Automate the reveal follow-up so no one falls through the cracks.
Minimal fake door brief template
Copy this into your experiment ticket:
- Hypothesis: [audience] + [entry point] + [placement] + [threshold] + [timeframe]
- Audience: [segment definition]
- Placement: [exact location in product or URL]
- Metric and threshold: [primary metric] must reach [X]% within [Y] days
- Run window: [start date] to [end date]
- Owner: [name]
- Reveal copy: [draft text for the disclosure modal or page]
- Instrumentation events:
fake_door_viewed(properties: user_id, plan, page, experiment_id),fake_door_clicked(same properties + timestamp, device),reveal_cta_completed(email captured) - Follow-up plan: email all clickers within 24-72 hours; schedule interviews with opt-ins
No-code vs. small-code: most in-app fake doors can be built without engineering using tools like Userpilot or AB Tasty. Involve engineering when you need the door to appear in a context those tools can’t reach (deep in a workflow, behind authentication layers, or tied to server-side logic).
What does the research say about avoiding misread click signals?
The biggest mistakes in fake door testing aren’t in the design. They’re in the interpretation.
Common biases to watch for
- Novelty effects: new UI elements get clicks simply because they’re new. A spike in the first 48 hours that doesn’t sustain is exploration, not demand. Run the test long enough (7-14 days) to see whether interest holds.
- Accidental clicks: especially on mobile. Filter by time-to-click and device type. A click that happens in under two seconds on a touch screen is suspect.
- Selection bias from poor targeting: if your door is only visible to your most engaged users, the CTR will look better than it actually is for the broader population.
- Small-sample volatility: a 25% CTR from 8 impressions is not a finding. Aim for at least 100-200 clicks where feasible before treating a result as meaningful.
Practitioner heuristics
- Timebox to 7-14 days and predefine your pass line before launch.
- Prefer consistent signals across two or three segments over a single high overall CTR.
- For low-traffic products, a minimum of 5+ actionable signups (not just clicks) is a reasonable floor before escalating to an MVP.
Turning clicks into insight
A well-run fake door test should convert clickers into a research cohort: capture email and 1-2 quick questions so you can turn behavioral signals into qualitative understanding. High click rates don’t always indicate the outcome users expect. Someone clicking “AI-powered reports” might want automated summaries; someone else might want natural-language querying. The click is the same. The need is different.
Follow-up methods that close that gap: short post-click surveys (2-3 questions max), scheduled 20-minute interviews with opt-ins, and AI-moderated micro-interviews for teams with large opt-in lists who can’t schedule calls at scale.
Pro Tip: Tag your opt-in list by the fake door they came from, the segment they belong to, and the date they clicked. When you’re ready to recruit for beta testing or user interviews, that tag structure lets you pull exactly the right people in minutes.
When fake doors work, and when they mislead you
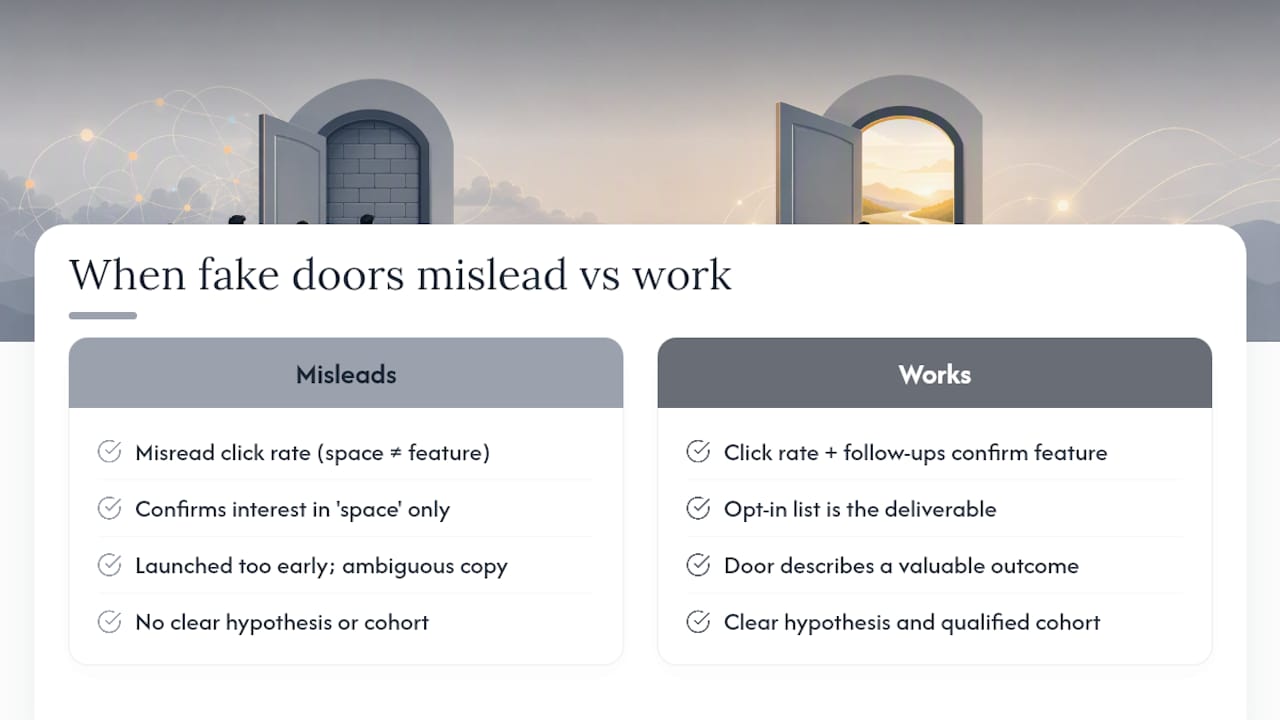
Most articles on fake door testing treat it as a clean, low-risk technique. It usually is. But the cases where it misleads teams are worth understanding, because they share a pattern.
The failure mode isn’t a bad click rate. It’s a misread click rate. The fake door confirmed that users wanted something in that space. It didn’t confirm they wanted that feature, at that price, with that workflow.
The fix isn’t to run fewer fake doors. It’s to treat the opt-in list as the real deliverable. The clicks are a filter. The conversations with clickers are the signal. Teams that skip the follow-up interviews are leaving the most valuable part of the experiment on the table.
There’s also a timing trap. Running a fake door too early, before you have a clear value statement, produces ambiguous copy, which produces ambiguous clicks. The door has to describe an outcome the user recognizes as valuable. If your team can’t write a one-sentence description of what the feature does for the user, the door isn’t ready to launch.
The method is genuinely fast and genuinely cheap. Those properties make it tempting to run it before the thinking is done. Resist that. A well-designed fake door with a clear hypothesis and a qualified cohort will tell you something real. A rushed one will tell you something, but you won’t know what.
Unthinkable gives you demand signals before you write the hypothesis
Running a fake door test requires a hypothesis. Writing a good hypothesis requires knowing which problems are worth testing. That’s where most product teams stall.
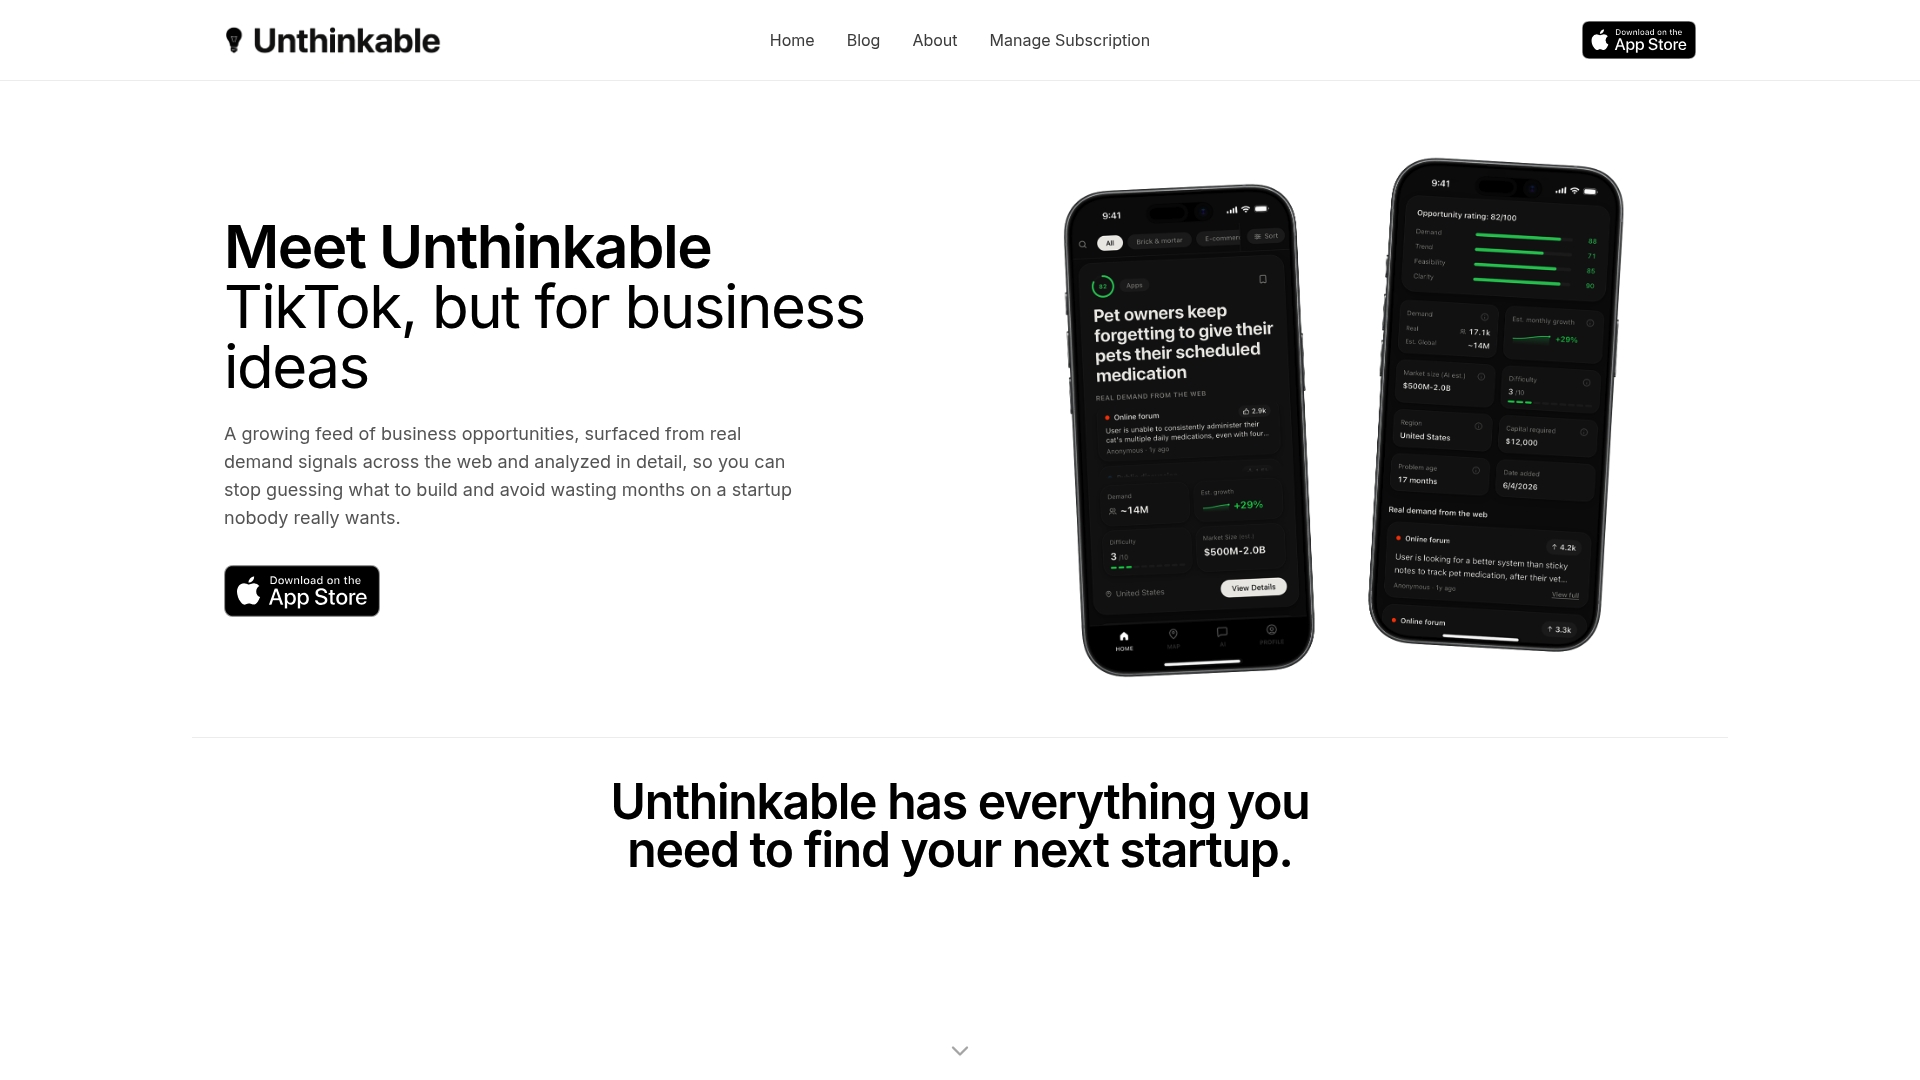
Unthinkable surfaces real demand signals from across the web, so you can identify underserved niches and high-intent problems before you design a single experiment. The Global Opportunity Finder shows you where demand exists by location and category. The AI Advisor helps you map out an MVP and structure your launch, so the path from fake door to build is shorter and more deliberate. When your fake door generates an opt-in list, Unthinkable’s opportunity data helps you understand whether those clickers represent a market worth pursuing or an edge case.
Download Unthinkable and bring real demand data into your next experiment brief.
Sources
These sources cover methodology, benchmarks, and practitioner playbooks for fake door testing:
- What Is Fake Door Testing: Methods And Best Practices
- Painted door test
- Fake Door Testing (Painted Door Test): Validate Demand Before You Build, Koji
- Fake Door Test: A Guide to Quickly Validating Ideas
- Painted door test